How to turn a screen recording into a GIF on macOS
To convert a Mac screen recording to an animated GIF, run a two-pass ffmpeg palettegen/paletteuse command for the best quality at the smallest size, or use SnapShelf ($49 one-time, macOS 13+) to export one directly.
Last updated
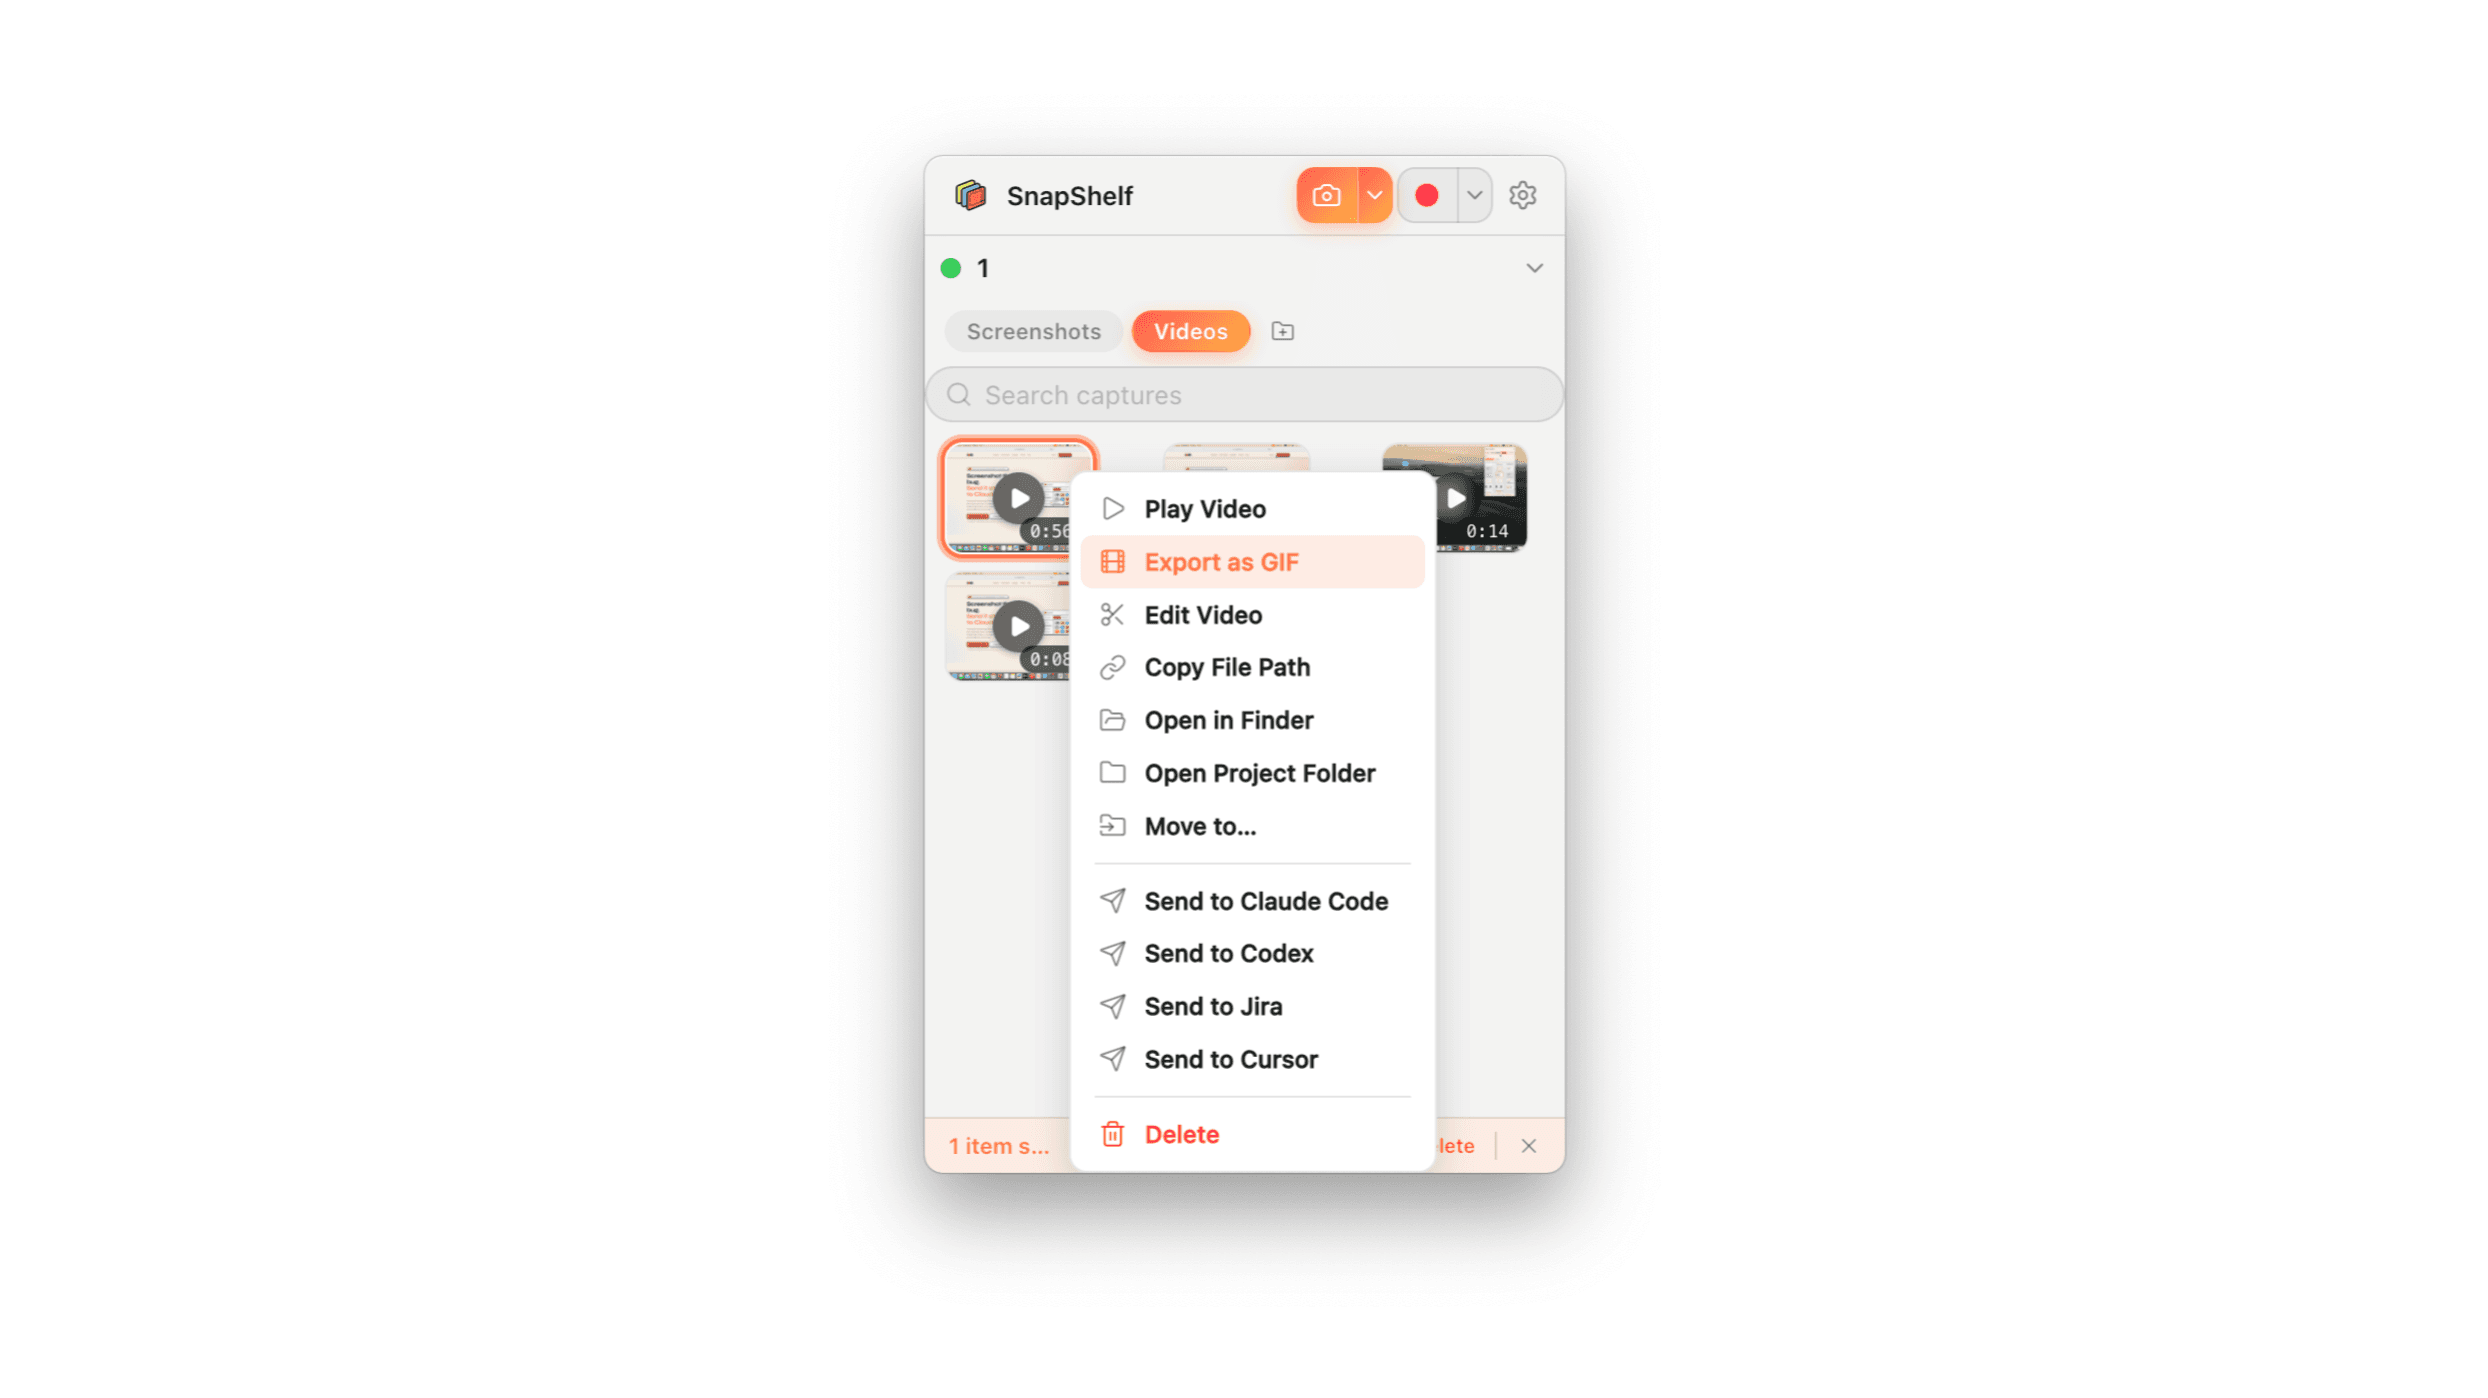
The GIF export panel in SnapShelf, showing a trimmed screen recording being written to an optimised animated GIF.
Why GIF at all, when MP4 is better in every technical sense
A GIF is a worse video codec than anything invented since 1995. It is capped at 256 colours per frame, it has no real interframe compression, and a 20-second screen recording can balloon past 30 MB. If you are sending a demo to a colleague, send the MP4.
You still want a GIF for one reason: it autoplays inline, silently, everywhere. GitHub issues, GitHub pull request comments, Linear, Jira, Slack, and Notion all render an animated GIF in the body of a comment without a click. An MP4 in a GitHub issue becomes a black player box that the reviewer has to press play on — and reviewers do not press play.
So the rule is narrow and practical. Bug repro in a tracker, a 4-second interaction in a PR description, a hover state in a design comment: GIF. Anything longer than about 15 seconds, anything with narration, anything where the detail matters more than the autoplay: MP4.
Keep them short. A GIF that needs to be 40 seconds long is a video that wants to be an MP4.
The free route: two-pass ffmpeg with a generated palette
This is genuinely the highest-quality way to make a GIF, and it costs nothing. It is worth understanding even if you end up using a GUI, because every good GIF exporter is doing some version of this under the hood.
The problem is the 256-colour ceiling. If you let an encoder pick those 256 colours using a generic web-safe palette, gradients band horribly and anti-aliased text goes muddy. The fix is to analyse your specific clip first, build a palette optimised for the colours that actually appear in it, and only then encode. That is what palettegen and paletteuse do, and it is why this takes two passes.
Install ffmpeg with Homebrew: brew install ffmpeg. Then run the two commands below. The first writes a palette.png — a tiny image that is literally just the 256 colours your clip uses most. The second encodes the GIF against it.
Pass one, generate the palette: ffmpeg -i input.mov -vf "fps=15,scale=800:-1:flags=lanczos,palettegen" -y palette.png
Pass two, encode using it: ffmpeg -i input.mov -i palette.png -lavfi "fps=15,scale=800:-1:flags=lanczos [x]; [x][1:v] paletteuse" -y output.gif
Three knobs matter. fps=15 is the single biggest lever on file size — screen recordings read fine at 12–15fps and you rarely need more; drop to 10 for a static UI. scale=800:-1 sets the width in pixels and the -1 keeps the aspect ratio automatic; 800 is a sensible width for a GitHub comment, and halving the width roughly quarters the file. flags=lanczos is the resampling filter and it produces noticeably sharper downscaled text than the default.
Two extras worth knowing. Add dither=bayer:bayer_scale=5 to the paletteuse filter if you see banding in gradients — it trades a faint crosshatch texture for smoother colour transitions. And add -ss 00:00:03 -t 5 before the -i to trim, taking a 5-second clip starting at 3 seconds, which saves you a round trip through a video editor.
The honest downside is not the syntax — it is the loop. Record, find the file, trim, guess an fps, run two commands, look at the result, decide 15fps was too choppy, change it, run both again. That is fine once. It is tedious as a daily habit, which is the entire argument for the one-click route below.
- 1Install ffmpeg: brew install ffmpeg
- 2Record your screen — ⌘⇧5, choose Record Selected Portion, then Stop from the menu bar
- 3Generate the palette: ffmpeg -i input.mov -vf "fps=15,scale=800:-1:flags=lanczos,palettegen" -y palette.png
- 4Encode against it: ffmpeg -i input.mov -i palette.png -lavfi "fps=15,scale=800:-1:flags=lanczos [x]; [x][1:v] paletteuse" -y output.gif
- 5Check the file size — if it is over about 10 MB, lower fps to 10 or scale to 600 and re-run both passes
- 6Drag output.gif into the GitHub, Linear, or Jira comment box
Doing it in one step with SnapShelf
SnapShelf is a macOS menubar capture and screen-recording app, $49 one-time, macOS 13 Ventura and later, universal binary for Apple Silicon and Intel. It records your screen and exports any recording to an optimised animated GIF from the same panel.
The workflow collapses to: record, stop, export to GIF. It is an action on the saved recording in your library rather than a render of an edited timeline, and the file is written next to the original and copied to your clipboard, so the next thing you do is ⌘V into the issue. No intermediate file to locate, no second command, no palette.png cluttering your working directory. There is also a setting that exports a GIF automatically after every recording, off by default.
What you give up is control. ffmpeg lets you tune the dither algorithm and the exact frame timing; an export button picks the defaults for you — and the defaults here are the ones described above: palettegen with stats_mode=diff, paletteuse with a Bayer dither, Lanczos scaling, 12fps, and a maximum width of 640px. If you are producing a GIF for a marketing page where every kilobyte and every gradient matters, drive ffmpeg directly. If you are producing a bug repro for a teammate who needs to see it in the next ten minutes, the export button is the right tool.
The one thing to plan for is length. Most GIFs are too long because trimming was inconvenient, not because the extra seconds were useful — and since the GIF is converted from the recording rather than from an edit, the lever is recording tightly: start at the interaction, stop when the result lands. The multi-track editor, with trim, split, and per-clip speed, is there for the MP4 route.
- 1Open the Record tab in the SnapShelf menubar panel and hit Record
- 2Start at the interaction and stop the moment the result lands — the recording appears in the shelf immediately
- 3Right-click the recording in the library and choose the GIF export
- 4Let the palette-optimised conversion run — 12fps, capped at 640px wide
- 5Paste (⌘V) straight into the GitHub, Linear, or Jira comment
Getting the file size down before you blame the encoder
Nearly every oversized GIF is oversized for a reason that has nothing to do with compression settings. Work through these in order before you start tuning dither modes.
Record a region, not the whole display. A 3024×1964 Retina screen recorded full-screen and scaled down to 800px throws away most of its pixels and keeps all of its file size problems. Record the 700×400 region where the bug actually happens and you skip the scaling step entirely.
Cut the length. Ten seconds is a long GIF. Most bug repros are three to five seconds of actual signal wrapped in ten seconds of moving the mouse toward the button.
Hold the camera still. GIF has no meaningful interframe compression, so every pixel that changes between frames costs bytes. A recording where you scroll a long page constantly is close to worst-case; a recording where only a dropdown opens is close to best-case. If you can demonstrate the bug without scrolling, do.
Then, and only then, lower the frame rate. Going from 30fps to 15fps roughly halves the size and is almost imperceptible for UI motion.
Most trackers will reject an attachment over a certain size — GitHub currently caps issue attachments in the tens of megabytes — but long before you hit a hard limit you have made a file that takes a reviewer on hotel wifi twenty seconds to load. Aim under 5 MB and you will never think about it again.
Try SnapShelf
$49 once — 2 years of free updates, no subscription, and everything stays on your Mac. 30-day money-back guarantee.
macOS 13+ · Apple Silicon & Intel
FAQ
Questions, answered
Everything you need to know before buying.
Not directly. The built-in ⌘⇧5 tool records to .mov, and neither QuickTime Player nor Preview will export an animated GIF from it. You need ffmpeg, Shortcuts with a third-party action, or a dedicated app. The two-pass ffmpeg palettegen method is free and produces the best quality available.
Stop hunting for screenshots. Start shipping.
Every capture filed, annotated, recorded with cursor auto-zoom, and one right-click away from your Claude Code session. One-time $49, yours forever.
30-day money-back guaranteeOne-time purchase2 years of free updatesLocal-only datamacOS 13+ · Apple Silicon & Intel