How to record and edit your screen on a Mac
Press ⌘⇧5 and choose Record Entire Screen or Record Selected Portion — or use QuickTime’s File → New Screen Recording. Both are free and built into macOS, but their only editing is Trim (⌘T).
Last updated
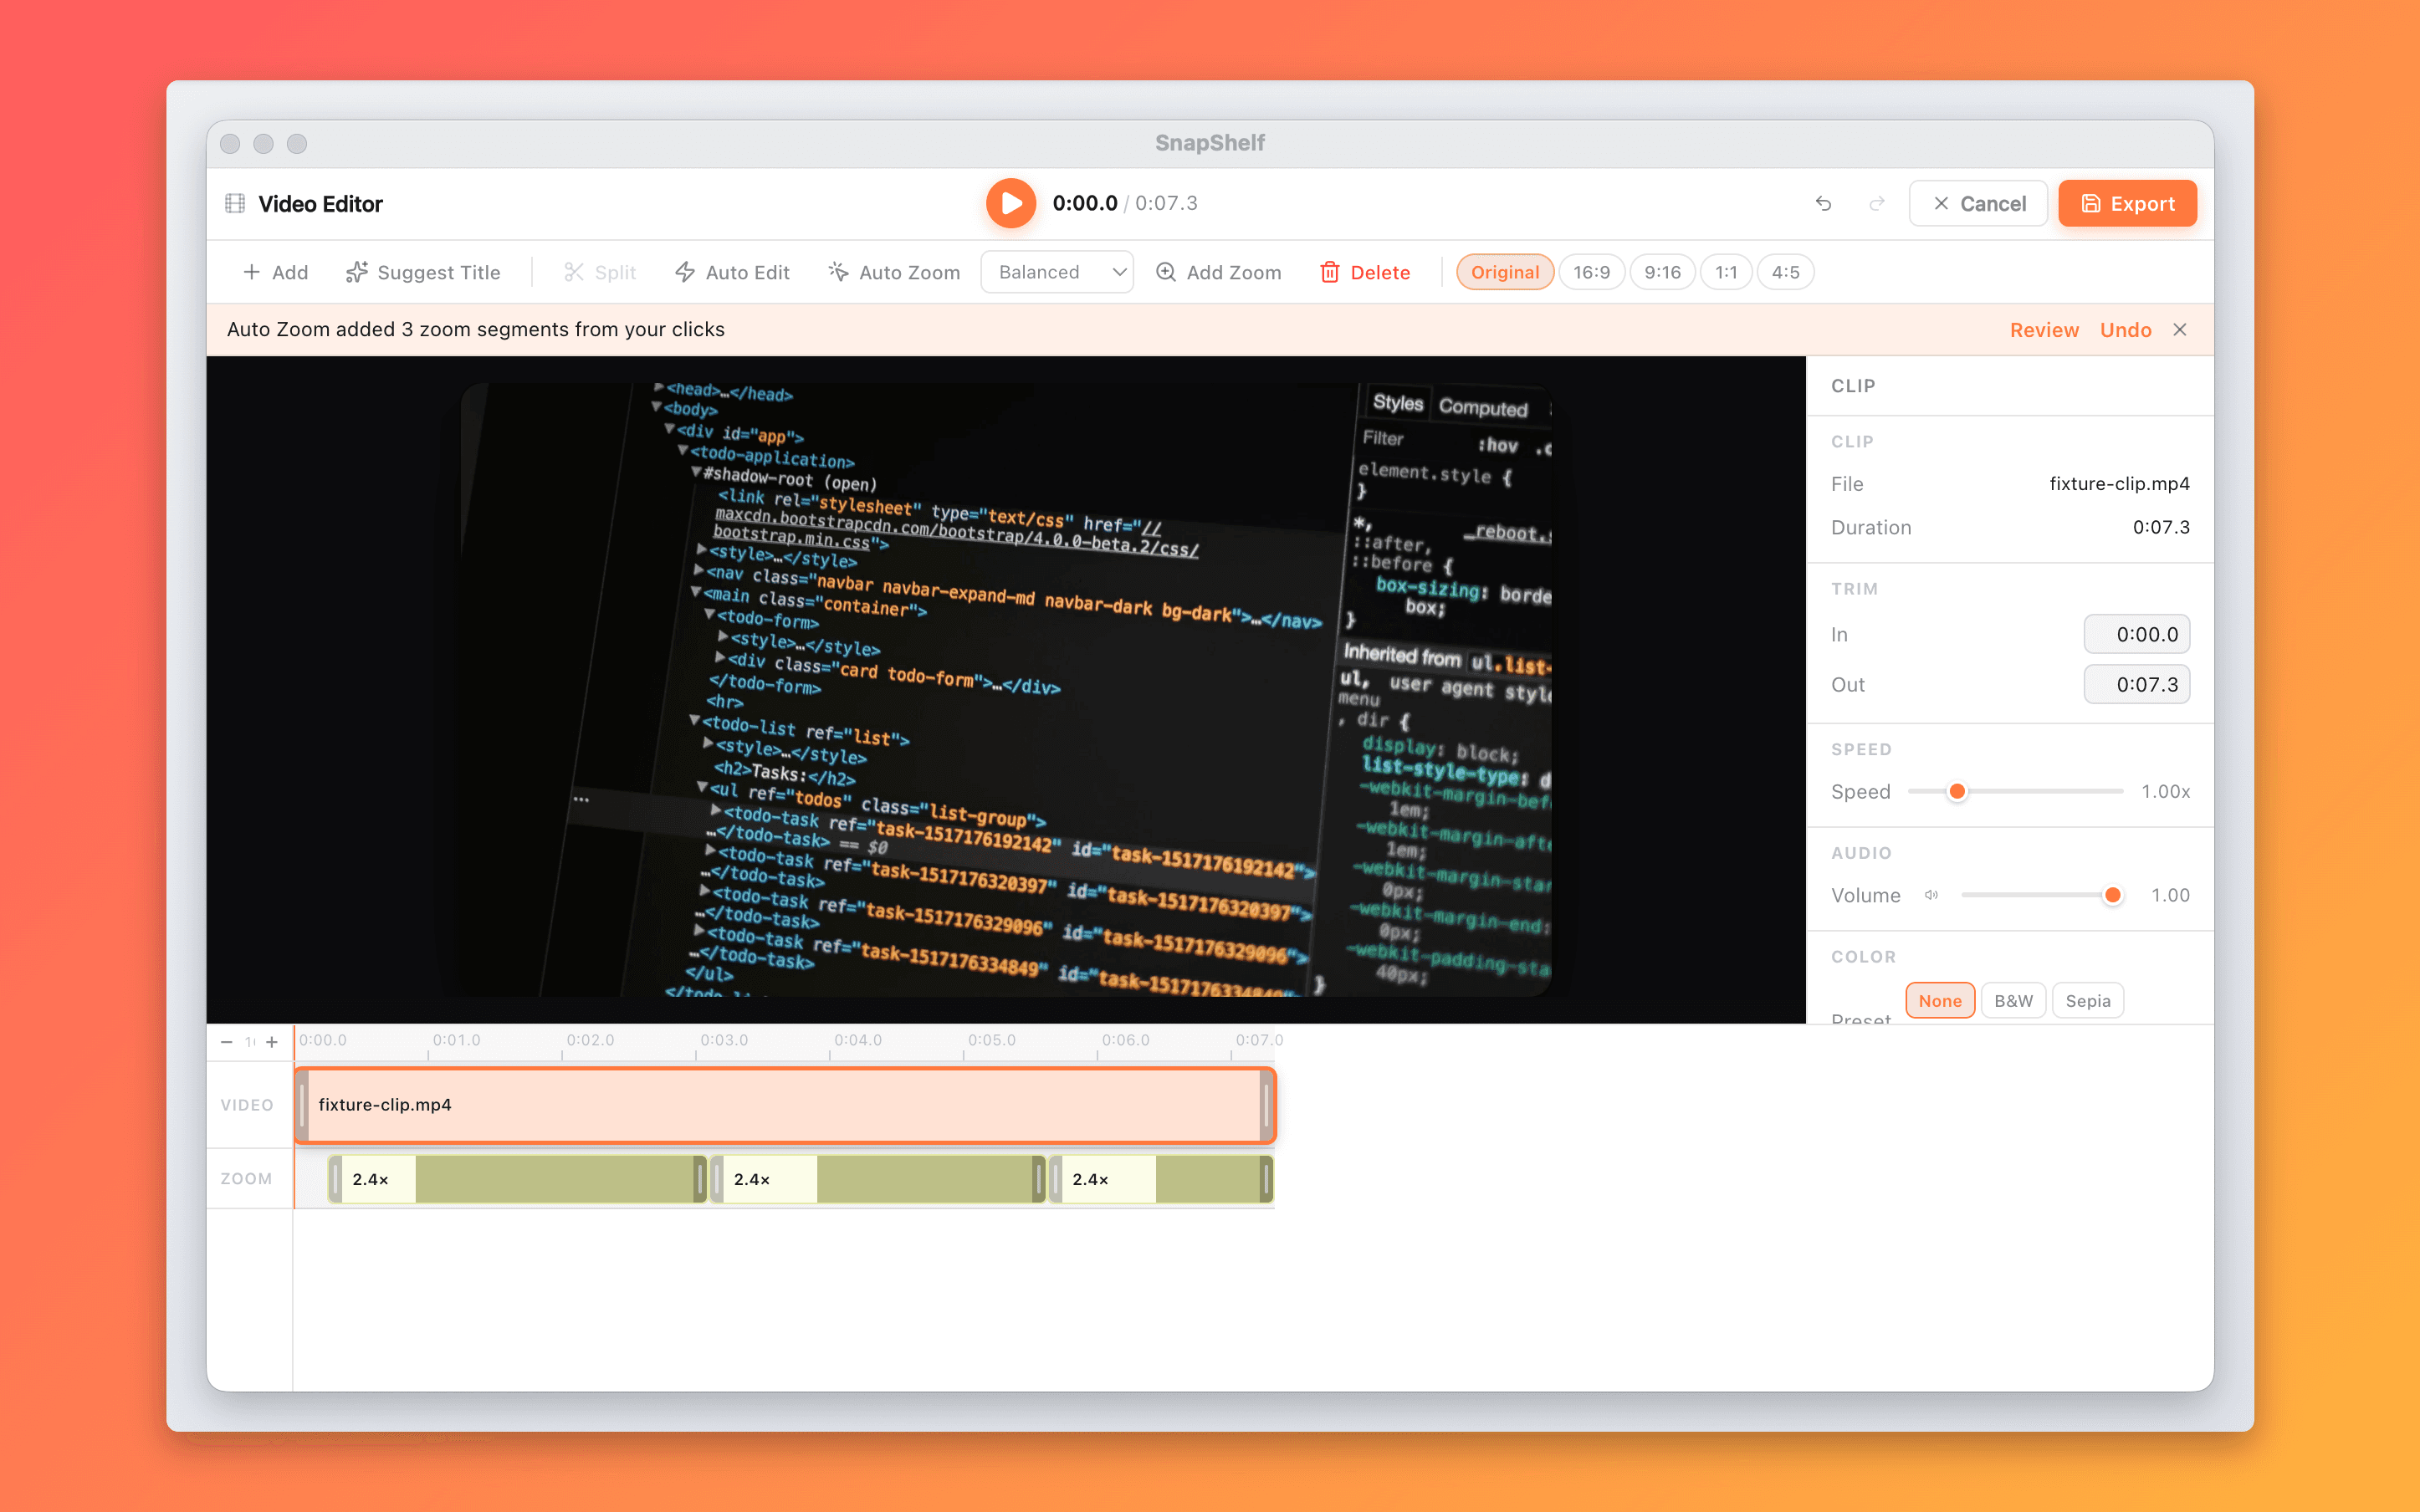
The SnapShelf timeline with a video track, music and voiceover tracks below it, and an auto-zoom segment selected.
Recording free with ⌘⇧5
macOS has had a competent screen recorder since Mojave and it is behind the same ⌘⇧5 toolbar as the screenshot tools. Most people who go looking for a screen recorder on the Mac already have one installed.
The toolbar has five buttons: three capture modes on the left, then Record Entire Screen and Record Selected Portion. Pick one, then open Options before you start — that is where the useful settings live.
Options gives you the save location, a 5- or 10-second timer, your microphone selection, whether to remember the last selection, and a “Show Mouse Clicks” toggle that puts a dark circle around each click in the recording. Turn that on for any tutorial; it is a small thing that makes a recording substantially easier to follow.
One important limitation: macOS does not record system audio through this path. The Microphone menu lists input devices only. If you need the sound the Mac itself is producing — an app’s audio, a video playing on screen — the built-in recorder cannot capture it without a virtual audio device installed.
Stop the recording from the menubar stop button or with ⌃⌘Esc. A thumbnail appears in the corner; click it to open the capture immediately, or leave it and the file saves to your chosen folder as .mov.
- 1Press ⌘⇧5 to open the capture toolbar.
- 2Click Options and set the save location, timer, and microphone.
- 3Turn on “Show Mouse Clicks” if the recording is a walkthrough.
- 4Choose Record Entire Screen or Record Selected Portion.
- 5For a selected portion, drag to define the region, then click Record.
- 6Do the thing you are recording.
- 7Click the stop button in the menubar (or press ⌃⌘Esc) to finish.
- 8Click the corner thumbnail to review, or find the .mov in your save folder.
The QuickTime route, and when to prefer it
QuickTime Player has its own screen recording entry point, and although it now hands off to the same underlying system it is worth knowing for two reasons.
First, it is the path for recording a connected iPhone or iPad: plug in the device, choose File → New Movie Recording, and select the device as the camera source. That is genuinely useful and has no ⌘⇧5 equivalent.
Second, QuickTime is where the built-in editing lives, so if you are going to trim anyway you may as well finish in the app you started in.
Everything else — the mic selection, the click highlighting, the save location — is the same set of options surfaced through a different door. There is no quality or capability difference for plain screen recording.
- 1Open QuickTime Player from Applications.
- 2Choose File → New Screen Recording.
- 3Set your microphone and options from the toolbar that appears.
- 4Record, then stop from the menubar.
- 5The recording opens in a QuickTime window ready to save or trim.
Exactly where the free editing stops
This is the part worth being precise about, because “you can edit it in QuickTime” is technically true and practically misleading.
QuickTime’s editing is Edit → Trim (⌘T). You get a filmstrip with two yellow handles. You drag them inward to set a start point and an end point, and you click Trim. That is the entire feature.
You can also cut, copy, paste, and delete sections via the Edit menu, and rotate or flip. Combined with Edit → Add Clip to End you can crudely stitch two recordings together. It works, but there is no timeline, so every operation is done by dragging playhead-adjacent handles and hoping.
What is not there, at all: no zoom, no cursor effects beyond the click circles you had to enable before recording, no text overlays, no transitions between clips, no background music track, no voiceover track, no per-clip speed adjustment, no colour correction, no crop, no aspect-ratio change, no GIF export, and no way to remove a silent gap without manually cutting each one.
So the honest summary: macOS will record your screen well and let you cut the dead air off the front and back. If the recording is a bug repro for a teammate, that is genuinely all you need and you should not buy anything. If it is a demo, a tutorial, or anything with an audience, you will hit the ceiling on your first attempt.
What a real editor adds
The gap between “trim the ends” and “finished video” is where a timeline editor earns its keep. SnapShelf records and edits in one app on macOS 13 Ventura+, for $49 one-time.
Recording side: microphone and system audio toggle independently, so a silent bug repro and a narrated demo are the same two clicks apart. The system-audio side needs a virtual loopback device — BlackHole or similar — which SnapShelf downloads on demand and sets up with a guided flow including a live level meter; without one it quietly records the mic alone. Cursor movement is recorded as data — click and scroll timing, never keystrokes, never characters — provided Settings ▸ Recording ▸ Capture cursor data is on, which it is by default.
That cursor data is what drives the editing. Auto-zoom punches in on every click and pulls smoothly back out, with scale, focus point, and easing tunable per segment. Click ripples, cursor highlight, and a spotlight that dims everything but a circle around the pointer are all available, and none of them touch your export until you open the Cursor FX panel. Once you do, ripples is the default-on choice; highlight and spotlight stay off until you switch them on.
The timeline itself is multi-track: trim, split at the playhead, reorder, per-clip speed, WYSIWYG crop, colour grading and six filter presets (none, black and white, sepia, vivid, warm, cool), text and image overlays, 44 transitions, and independent audio lanes — background music and voiceover each get their own, as many as you add, each with its own volume and fades, over the top of every clip’s original audio. Five aspect-ratio options — Original, 16:9, 9:16, 1:1, 4:5 — with black, colour, gradient, or blurred-video letterboxing. Auto-Edit finds the silent gaps in the first clip, at a fixed -30 dB over 600 ms, and cuts them in one click, replacing every clip in the project after a confirmation — the difference between a rambling ten minutes and a tight three.
Export is MP4 — H.264 with AAC audio, faststart, at auto, 30, or 60 fps — and any saved recording converts to a one-click optimised animated GIF, which is usually what you actually want for a GitHub issue. Everything renders locally; nothing is uploaded.
The fair comparison: Screen Studio is $89 and does the produced-recording job with deeper motion presets, automatic device frames, and iOS device recording. If recordings are your entire output, it is the more focused tool. SnapShelf is the answer when recording is one part of a workflow that also involves screenshots, annotation, and filing.
- 1Open the Record tab in the SnapShelf menubar panel.
- 2Toggle microphone and system audio for what you need.
- 3Hit Record, do the walkthrough, hit Stop.
- 4Open the recording and click Edit — auto-zoom is already applied to every click.
- 5Click Auto-Edit to strip the silent gaps.
- 6Trim or split anything left over, add music or a voiceover track, adjust fades.
- 7Export as MP4 in your target aspect ratio, or as a GIF for an issue thread.
Try SnapShelf
$49 once — 2 years of free updates, no subscription, and everything stays on your Mac. 30-day money-back guarantee.
macOS 13+ · Apple Silicon & Intel
FAQ
Questions, answered
Everything you need to know before buying.
Yes. Press ⌘⇧5 and choose Record Entire Screen or Record Selected Portion, or use QuickTime Player’s File → New Screen Recording. Both are built into macOS and have no time limit or watermark.
Stop hunting for screenshots. Start shipping.
Every capture filed, annotated, recorded with cursor auto-zoom, and one right-click away from your Claude Code session. One-time $49, yours forever.
30-day money-back guaranteeOne-time purchase2 years of free updatesLocal-only datamacOS 13+ · Apple Silicon & Intel