How to extract text from a screenshot on a Mac
macOS has free built-in OCR called Live Text: open the screenshot in Preview or Quick Look, hover until the cursor becomes an I-beam, then select and copy it like any text.
Last updated
A captured terminal stack trace in the SnapShelf editor with the recognised text extracted alongside it.
Use Live Text first — it is free and it is good
Let us lead with the part that costs nothing. Since macOS Monterey, Apple has shipped Live Text: on-device text recognition that runs automatically on images throughout the system. It is accurate, it is fast, it runs entirely locally, and a great many people who go searching for a Mac OCR app already have a perfectly good one installed.
It works anywhere images are displayed — Preview, Quick Look, Photos, Safari, Notes, Messages — and it requires no setup, no permission grant, and no network connection.
The interaction is deliberately subtle, which is why it goes unnoticed. Hover over text in an image and your cursor changes from an arrow to an I-beam. That is the signal that the text is live. From there you select and copy exactly as you would in a text document — click and drag, or triple-click for a paragraph, or ⌘A then ⌘C for everything.
Preview and Quick Look also show a Live Text button — a small icon with lines of text in a box — in the lower right corner of the image. Click it and every recognised text region highlights at once, which makes it far easier to see what is selectable before you start dragging.
- 1Find the screenshot in Finder and press Space for Quick Look, or double-click to open it in Preview.
- 2Move the cursor over the text — it becomes an I-beam when text is recognised.
- 3Optionally click the Live Text button in the lower right to highlight all recognised regions.
- 4Drag to select, or press ⌘A to select all recognised text.
- 5Press ⌘C to copy.
- 6Paste into your editor, terminal, or issue tracker with ⌘V.
Live Text tips most people miss
Right-clicking selected Live Text gives you more than Copy. Look Up, Translate, and Share are all there, and for recognised phone numbers, addresses, dates, and URLs macOS offers a contextual action — call, open in Maps, create an event, open the link.
It also works on video. Pause a video in QuickTime or Safari and text in the frozen frame is selectable, which is a fast way to grab a command out of a screencast without retyping it.
Language support is broad but not universal, and recognition quality drops on very low-resolution images, heavily stylised type, and light text on busy backgrounds. If a selection comes out garbled, retake the screenshot at a larger window size rather than fighting the OCR — resolution is almost always the actual problem.
One genuine limitation to know: Live Text is a per-image, interactive feature. There is no “extract text from these 40 screenshots” command anywhere in macOS. It is designed for the moment you are looking at one image.
The three cases where Live Text is not enough
Volume is the first. Live Text is a hover-and-drag interaction on one open image. If you have a folder of forty captures — a QA session, a batch of receipts, a set of screenshots from a support thread — you are opening forty files and dragging forty selections. There is no built-in batch path, and Automator does not expose Live Text as an action.
Workflow position is the second, and it is the one that bites developers. The realistic sequence is: screenshot a stack trace, open Finder, find the file, press Space, hover, select, copy, switch back, paste. That is seven steps to get an error message out of an image you took four seconds ago. The text was one right-click away at capture time and you had to leave your editor to retrieve it.
Routing is the third and least obvious. Recognised text is useful for more than pasting — it can decide where a capture belongs. A screenshot of a build failure and a screenshot of a client mockup are indistinguishable as files, but not as content. Live Text cannot act on what it reads; it can only hand it to you.
None of these are Live Text failing at its job. It does exactly what it was designed to do, well. They are the boundary of a per-image interactive feature.
OCR inside the capture workflow
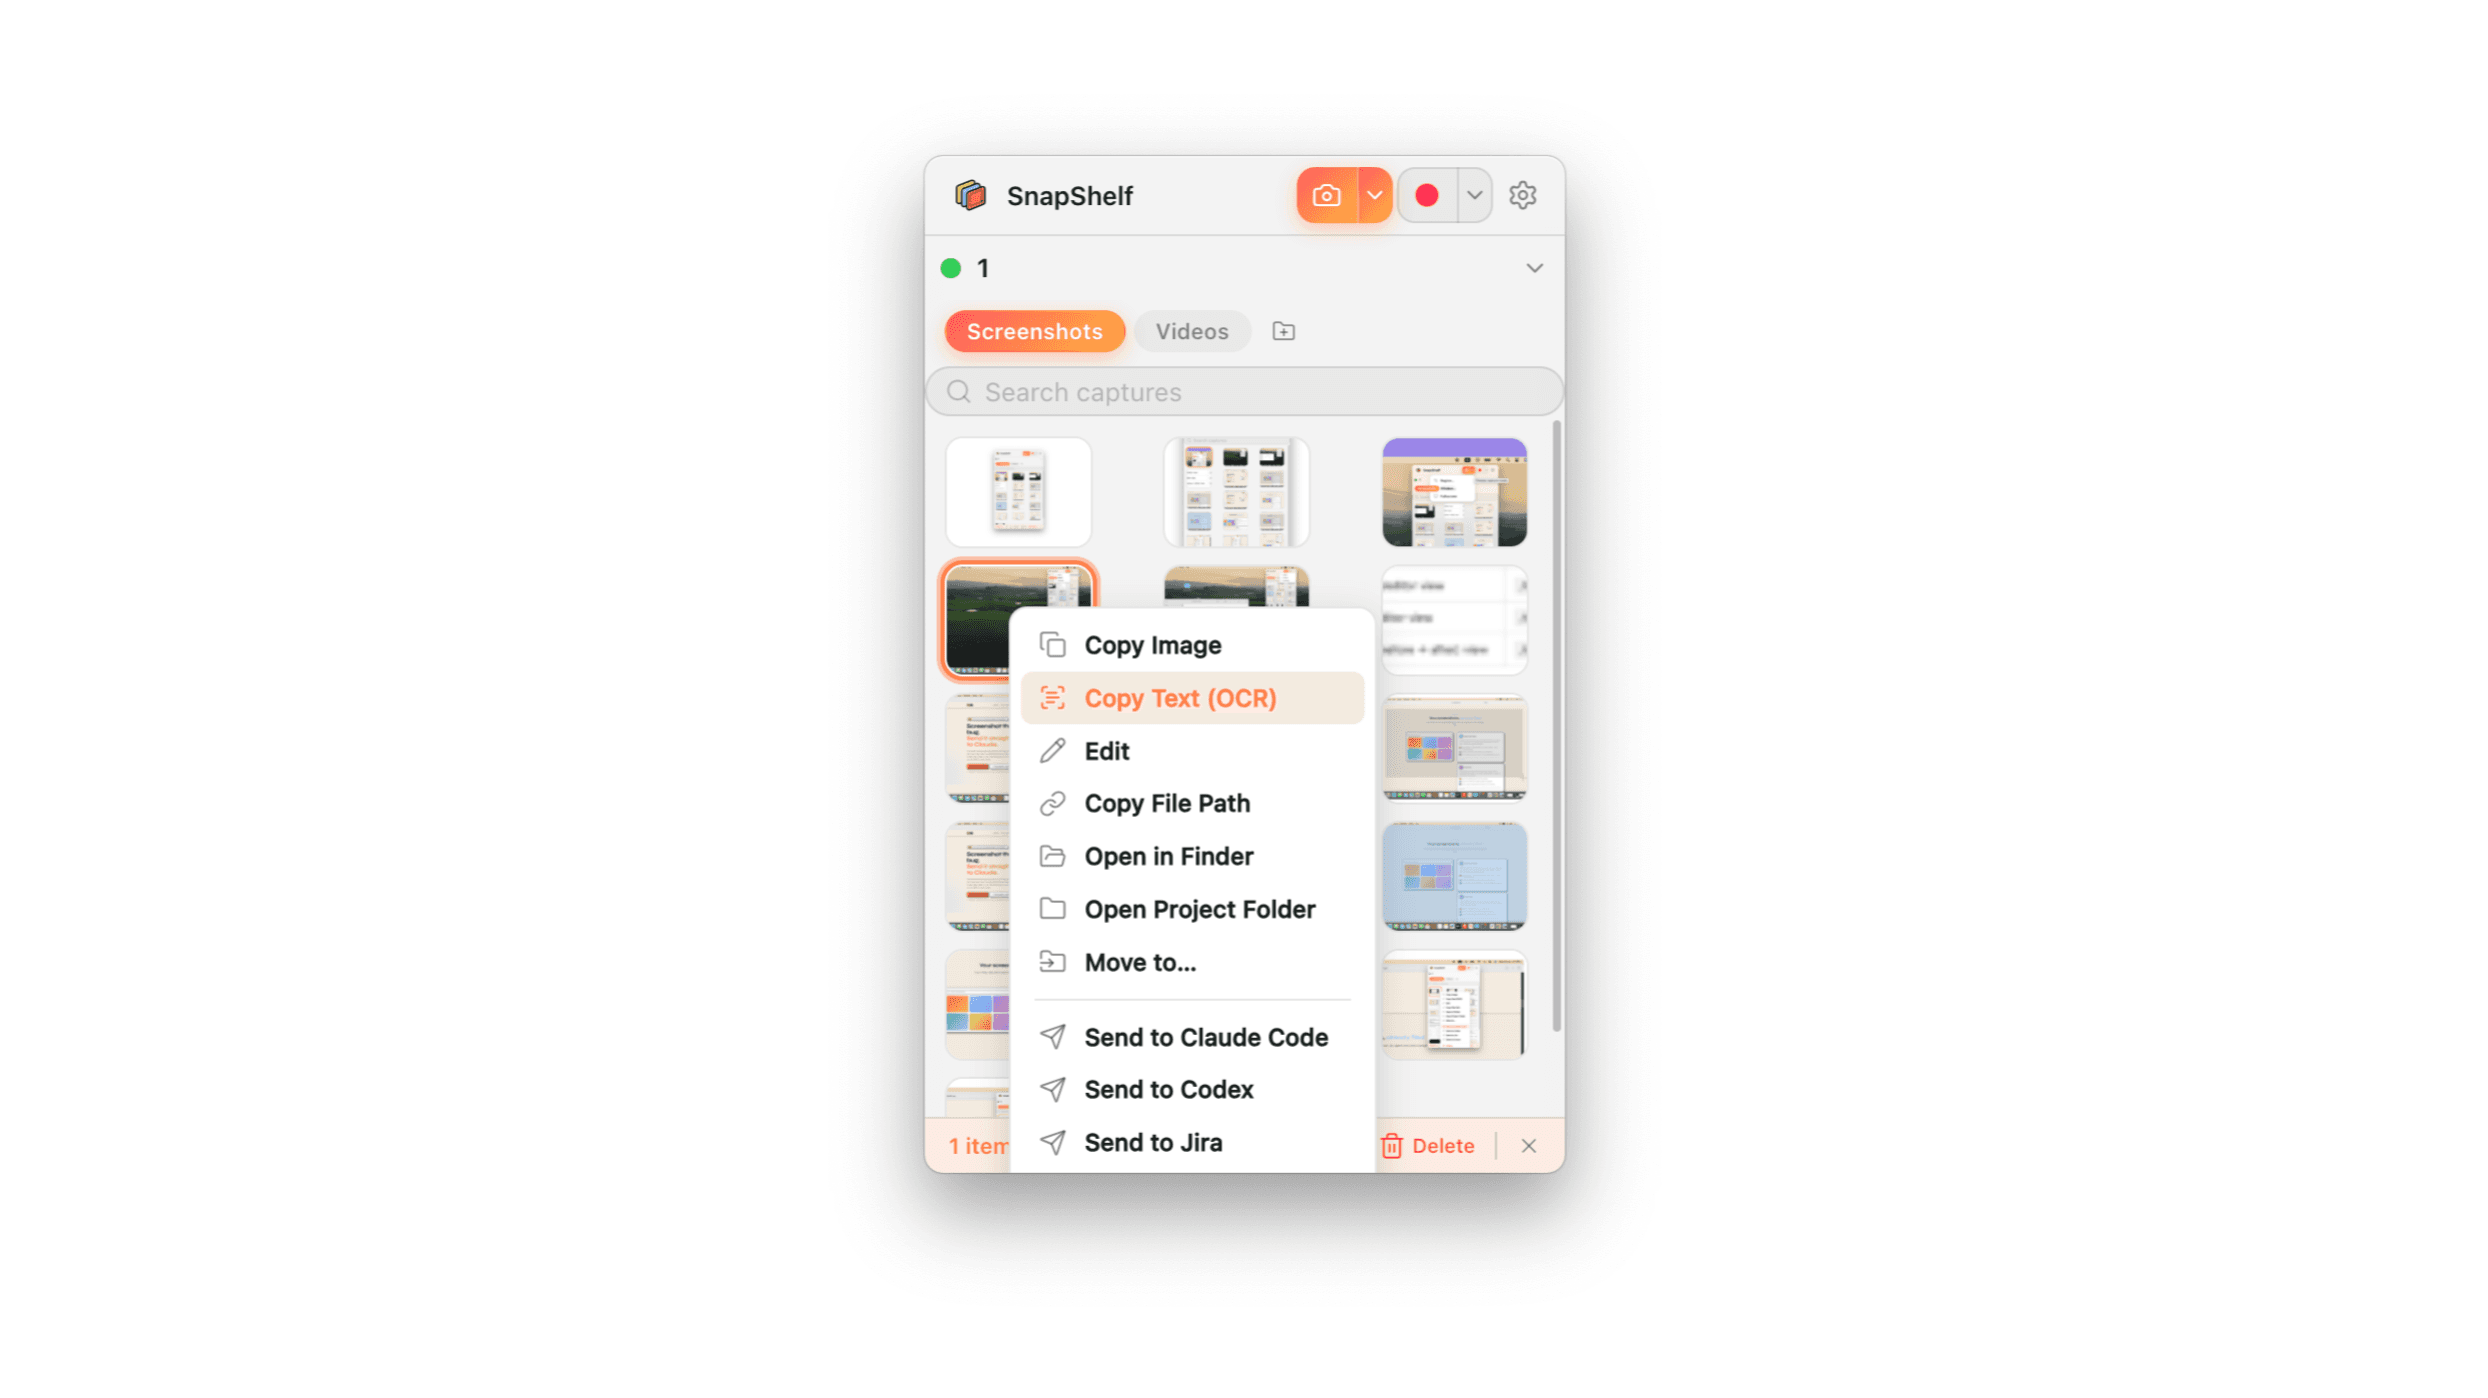
SnapShelf runs OCR on-device on any capture, straight from the gallery, without opening Finder. Right-click the thumbnail and choose Copy Text (OCR) — there is no keyboard shortcut, the context menu is the whole interface — and the recognised text goes straight to your clipboard. Your image is never uploaded; recognition happens on your Mac on a bundled tesseract.js engine rather than Apple’s. The one qualifier: the first time you use it, a language model of a few megabytes is downloaded, and it runs offline from then on.
It works on the things developers actually screenshot: error dialogs, terminal output, stack traces, code, log excerpts, and screenshots of documents. The capture itself is already on your clipboard the moment you take it, so the OCR step is additive rather than a detour.
The recognised text also feeds auto-filing. When a window title is too generic to route on — an untitled browser tab, a bare terminal window — SnapShelf can use OCR content as a fallback to decide which project folder a capture belongs in. That is the routing case from the previous section, closed.
And once the text is out, Send to Claude Code puts the capture itself into a running Claude CLI session with a right-click, so a stack trace can go from screen to model without a manual paste. It finds that session by enumerating terminal tabs and matching the one running `claude`, which means Terminal.app and iTerm2 only, not inside tmux, and it needs macOS Automation permission. The neighbouring menu items are not the same trick: Codex copies the file path and opens nothing, and Jira copies the image and opens a URL you configure in Settings — it does not create an issue or attach anything.
The trade-off, stated plainly: for one screenshot, Live Text is free and roughly as good, and you should use it. SnapShelf is $49 one-time on macOS 13 Ventura+, with 2 years of free updates and a 30-day money-back guarantee — worth it when OCR is one step in a workflow you repeat all day, not a thing you do occasionally.
- 1Take a capture, or select an existing one in the SnapShelf gallery.
- 2Right-click its thumbnail to open the context menu.
- 3Choose Copy Text (OCR) — there is no keyboard shortcut for it.
- 4The recognised text is extracted and copied to your clipboard.
- 5Paste it wherever you need it — the image itself is still on the shelf and still filed.
Try SnapShelf
$49 once — 2 years of free updates, no subscription, and everything stays on your Mac. 30-day money-back guarantee.
macOS 13+ · Apple Silicon & Intel
FAQ
Questions, answered
Everything you need to know before buying.
Yes. Live Text is built into macOS Monterey and later. Open the screenshot in Preview or Quick Look, hover until the cursor becomes an I-beam, then select and copy. It runs entirely on-device with no network connection required.
Stop hunting for screenshots. Start shipping.
Every capture filed, annotated, recorded with cursor auto-zoom, and one right-click away from your Claude Code session. One-time $49, yours forever.
30-day money-back guaranteeOne-time purchase2 years of free updatesLocal-only datamacOS 13+ · Apple Silicon & Intel